Due to poor technical support, downtime, or other reasons, there are high chances you want to migrate your website from one server to another.
Do you want to migrate your website for some reason? Then you must be looking for instructions for changing your website host. And we just got you covered for that.
In fact, this is a step-by-step guide covering everything for transferring your website to a new host. We suggest you kindly read the article from top to bottom to get clear about the process.
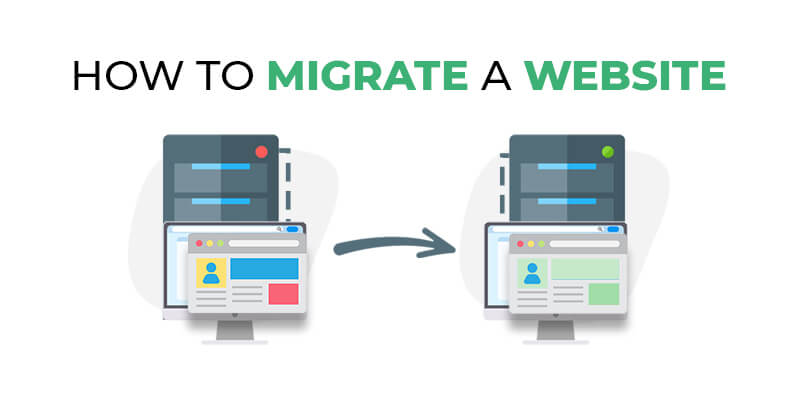
How to migrate a website from one server to another: The 12 effective steps
Whether you are running a simple or complex website, this process is effective for both.
Before you migrate website:
- Inspect the tools or benefits of the new server
- Make a backup of your website
- Add your site to the new hostAfter you migrate the website:
- Move files to your new server
- Export existing database from the current host
- Import database to the new host
- Test your site
- Configure your email address
- Redelegate your domain
- Double-check everything
- Close your old hosting account later
Okay! Now that you have seen the steps, let’s jump into demonstrating them –
1. Thoroughly check your new host
Your current server may suck because of horrible downtown and technical support. Check and know more about the host that you are going to get next. That server may be worse than your existing server.
Make 100% sure the new host meets your requirements before you finally move your website to their server. The new server should at least have greater speed and bandwidth than your current server.
With that being said, check if the features meet your requirements. They might offer a lot of features, but not all of them will be applicable to your situation. Choose a server that offers the most compatible features for your website.
2. See what tools or benefits they are offering
Before changing your website host, look for the tools and benefits they are offering. See if your new host offers either a free or affordable paid service for migrating your website.
If you are running a WordPress website, there are some of the best WordPress hosting providers that will migrate your WordPress site for free. Some of the reliable options are –
- WP Engine
- Kinsta
- Flywheel
- SiteGround (by using SiteGround automated website transferring tool)
- DreamHost (by using DreamHost automated website transferring tool)
The renowned hosts maintain a policy of migrating at least one domain for free. It becomes easier when you are moving your website from one cPanel to another, aside from Plesk or any other hosting control panel. For example –
- GreenGeeks
- A2 Hosting
- InMotion Hosting
Web host providers like Bluehost, DreamHost, SiteGround offer professional website migration services at affordable prices. Perhaps, this may help to get an idea about the price –
| Company | Migration Charge |
|---|---|
| Bluehost. | $149.99 for professional website migration |
| Hostinger. | $69 to $149/year for professional website migration |
| DreamHost | $99 for website migration |
| SiteGround | $30 for single website migration |
So register your domain name to one of these hosts. If you would like to know about registering a domain name, we have covered an article where you can find out how to register a domain name for free.
3. Take backups of your website
You can either make backups of your website by using cPanel or an FTP client like Filezilla.
In order to generate complete site backups using an FTP client, you need to preserve the login credentials of your previous FTP server. Transferring files to your new server will become much easier by using backups generated by FTP clients. You just have to upload the files to your new server.
And if you want to make backups for your website using cPanel, then click on backups under the File section. It gives you access to generate full backups for your website. Remember to select “Home Directory” under the “Select Restore Type” section otherwise it won’t be of any good.
You can also decide whether or not you want to get email notifications when the full backup process is completed. We have already discussed a detailed method for backing up websites using cPanel.
Once the backup is complete, you can download the file. It will be a compressed file with a .gz extension. You don’t need to be alarmed, it’s a common type of compressed file.
What are the best website (WordPress) migration plugins and how to use them?
If you are running a WordPress site, there are plenty of backup plugins to help transfer your website to a new host. Based on test and review, these are some honorable mentions –
- Duplicator
- WP Migrate DB
- All-in-One
- WP Migration
- UpdraftPlus
- BackypBuddy
We will discuss the process of taking backups for your website with the Duplicator plugin. Although the backup process of most of the plugins is pretty much the same, there can be a few modifications sometimes.
— But why use Duplicator for backup?
Duplicator can work smoothly on any host and it is free. Now, let’s demonstrate the process.
First, install the plugin on your WordPress site. If you are not sure about installing WordPress plugins, we have already shown various methods of installing WordPress plugins. So, do check that out.

Once you are inside Duplicator, click on Create New which is next to Packages.

Click on Next. Also, if you want to review the parameters but that’s not obvious.

Duplicator will begin scanning your current hosting setup. It will also evaluate the compatibility of the setup for a hassle-free backup.
During the scanning, notifications may pop up from time to time. Just go through them by clicking Yes and proceed to the scan.
Finally, click on the Build button. If there is a notice, click this button right away.

Now, wait for some time as the backup process may take some time to complete. The process may take some time depending on the size of your website.

Once the backup process is completed, you will see the confirmation screen like below –

Download both Installer and Archive for the future. You will need to Installer for importing the backup file and the Archive file is your backup.
Handpicked Related Content: Mandatory Plugins for WordPress
4. Add your domain to the new server
You have to add your domain before moving your site to the new server. You don’t have to have a headache for this. This will become a breeze especially if you only have one site. Because your domain will be already entered when you register for a new host.
If you have multiple websites, then that will not be the case. Addon Domains are necessary for registering multiple websites to a new server.

In cPanel, additional domain names are called Addon Domains. This is a popular terminology for registering multiple domains in cPanel. But, some hosting providers may use other terminologies if they are not using Addon Domain.

5. Move necessary files to the new server
You can either move files from your old server to a new server by using cPanel File Manager or FileZilla FTP client.
If you want to use cPanel for transferring files, go to the cPanel dashboard. Once you are inside the dashboard, select the place where you want to save the files. Then, navigate to the directory that contains the necessary files you want to transfer.
Open two File Manager tabs –
- Tab 1: Containing the new server directory
- Tab 2: Containing the existing server directory
Select and download the file that you want to transfer. Once the download is finished, just drag and drop all the files into the new server directory. The files will be shown in Tab 1 (new server directory) if the transfer is successful.
The process of transferring files in FileZilla is pretty much the same.
6. Export database from existing host
All the CMS in the world like – WordPress, Drupal, Joomla, Magento, etc rely on databases for storing information. To migrate a website from one server to another, there are 2 tasks that you need to accomplish –
- Transfer necessary files of your existing server
- Transfer the database of your website
While you may have inserted files for particular reasons or functionality, your website’s content and settings are stored inside a database.
We have already discussed how you can transfer the necessary files to your website. Now, we will show you how to migrate the database to a new server. For migrating databases, there are basically 2 parts.
- First, you need to export the database from your existing server.
- Second, import the database to the new host.
Now, we are going to discuss the process of exporting a database from an existing server. You will find phpMyAdmin inside the cPanel. This database admin tool is offered by most hosting providers.
You can open phpMyAdmin by going inside the Databases section. You can select the important databases of your website that you want to migrate.
- Select the desired database
- Open the Export tab for that database
- Select Quick under the “Export method” section
- Keep SQL in the Format section
- Finally, click on Go to start exporting the database

7. Import the database to the new server
Once you have done exporting the database from your existing server, you need to import it to your new server. This is the reverse process of exporting a database.
Before you start importing a database, you have to create an empty database for your new server. New databases can be created by using MySQL Database Wizard under the Databases section, inside the cPanel dashboard.
Provide the following credentials while creating a new database using the MySQL Database Wizard –
- Name of the database
- Name of the database user
- Password for username

Now that you have given the credentials, it’s time to update the configuration settings and files. Once you have created a new database and submitted the user credentials, check ALL PRIVILEGES under the (Step 3: Add user to the database) section that will appear on the next screen.

After creating this empty database at your new server, follow this procedure –
- Select it from the left sidebar
- Select the Import tab
- Under the File to Import section, select the .sql.zip file that you have exported in the previous step.
- Start importing the database by clicking the Go button. Leave the rest of the settings as they are.

— Now here’s a trick!
You can skip the configuration settings by providing the exact same name of your database, username, and password that you have used on your old server. But if you don’t remember, follow the procedure we have shown.
Ideally, this will complete the database import-export work. Depending on the CMS, you may need to update the configuration after you create a database. But it entirely depends on your CMS and its configuration.
However, you may need to update some configuration details especially when you use a different database name, username, password. It’s hard to give specific instruction on this topic, but reading the following tutorials may help you with various CMS tools
8. Testing your website on the new server
Yes, you may have moved the files and database to the new server, the work is still not complete. Before going to live (before transferring DNS), test your site on the new server as much as you can.
As far as we are concerned, there are 2 ways to test your site on the new host. So, we are going to discuss them. But, there can be other ways as well.
Edit computer’s ‘hosts’ file:
To test your site on the new server, you need to instruct your operating system first to point to the new server. In this way, visitors can still visit your site from the old server while you are manually guiding your PC to use the new server.
So, when you enter yourdomain.com on your browser, your PC can detect the new server.
First, you need to provide the IP address of your server. This can be found inside the cPanel.

After that, you need to edit the ‘hosts’ file on your computer. Depending on the type of operating system, the process can vary. We have shown the process for Windows and Mac Os –
Find the hosts file on Windows –
To find the ‘hosts’ file in Windows, you need to check “Hidden items” under the View tab. Because the file often remains hidden.

Navigate to (C:WindowsSystem32driversetc.) to locate the file. The file has no extension, which allows you to open with any text editor i.e. Notepad.
Add a new line like below at the end of the file –
YOUR.SERVER.IP.ADDRESS YOURDOMAIN.com
As an example, save this line at the end of the file
– 130.6.18.91 YOURDOMAIN.com

To check everything is working fine, open a terminal window by going to the following directory –
Start > All Programs > Accessories > Command Prompt
Inside the Command windows, type the following line –
ping www.yourdomain.com
If you see the IP address of your new server as the output, then everything is fine.
Find the hosts file on Mac Os –
To find the ‘hosts’ file in Mac OS, open the Terminal app via App Launcher. Type the following in the Terminal and press enter –
Sudo nano /etc/hosts
It will ask for your admin password. Enter the password and hit enter. The ‘hosts’ file will be opened in the Nano text editor.

Inside the text editor, go to the very end using the arrow keys and this line –
YOUR.SERVER.IP.ADDRESS YOURDOMAIN.com
For example, add something like below –
10.21.11.192 YOURDOMAIN.com
After adding the line, hold down –
- Control + O → to save the file
- Control + X → to exit the file
If you have successfully done everything, the new version of your website will be shown when you browse to your domain.
Test your site via a temporary URL:
For your satisfaction, most hosting providers offer temporary URLs for viewing your site. This is a great benefit for the users as they can test their sites before finally switching domains.
A temporary URL may look something like the below –
Contact your host’s customer support team if you can’t find this temporary URL. Also, check whether the host provides temporary URLs before taking their services.
9. Configure your email address (optional)
This step might be optional but it is not to be taken lightly. The custom email address (e.g. name@themeim.com) from your old host can be very precious. So, you may want to use the same email address for the new host.
If you want to use a new email address for the new server, you can’t read the previous emails that may be urgent for you. Moreover, you have to set up a new email address in the cPanel anyway.
It is better to use the old email address on your new server. But you can recreate a new custom email via cPanel and use it at your new server.

10. Redelegate your domain to the new host
-Let more people find your domain on the internet by using the new server.
Relegating your domain will do this work. And this is an effective way to let everyone find your site on the new host. Follow the steps below to redelegate your domain –
Follow the steps below to redelegate your domain –
1. Check the hostnames of your new nameserver:
Hosting providers often send emails about nameservers. In most cases, hosting providers offer 2 nameservers.
- ns1.example.com
- ns2.example.com
Both nameservers include hostnames. Although it automatically happens, it is better to contact the hosting company about nameservers for your domain.
2. Change or edit the nameserver of your domain:
Look for ways to edit or change your nameserver. The entries of your nameserver will be switched with the host names of your new nameservers.
3. Sign in to your registrar’s website:
Remember
— The registrar and the company that is currently hosting your site may not always be the same. When you get hosting from your provider, the registrar usually sends the credentials to log in to your site. This allows you to update nameservers.
4. Take your time:
Let’s sit back and wait for redelegation. This is important for the propagation of your website on the internet. After the transition period of your website, it is best to wait about 24-48 hours.
11. Double-check everything again
Once you have done the essential tasks for changing your website host, test everything again. This time you will test everything on the new version of your site after browsing your domain.
After changing the website host, the change in your website usually takes around 30-60 minutes to take effect. But, it can take a day to two sometimes. After you move your site from one registrar to another, you should take a moment to examine the following –
- Run your website at the new host and see the functions are working.
- Run your website on different browsers to check cross-platform compatibility.
- Check if the emails are working correctly or not, especially if you can receive them.
- All the pages are working correctly.
- If you have any under construction pages, then set your website (Under Construction/Coming Soon) or redirect.
- All the plugins are working correctly.
- All forms are working correctly.
- Blog comments and user registration.
- Etc.
If the above criteria pass this test, you can hope everything will work properly.
12. Shut down the previous hosting account (optional)
After a few days, you should close down the old hosting account. Because users will start using your site on the new server rather than the previous one. It’s not better to keep the old account and the previous one at the same time. It’s not better for crawling your site on the new server.
Still, the odd search engine crawlers may visit the old server occasionally. You may still get email notifications to your old email account from the odd email spammer. But if there are such activities, you may notice very little activity.
Important –
- To avoid spam emails, It is better to remove the old host account along with the old email account from the old server.
- Don’t forget to change the hostname of the new mail server’s IP address back to its previous state.
If all these steps go accordingly, you will successfully migrate your website from one server to another. Congrats!
What to do next after moving your site to a new server?
Typically, there are a few things to do after you have successfully migrated your website to the target server. We have already mentioned them in the following steps –
- Redelegate your domain to the new host
- Double-check everything again
We can assure a successful website migration to a new server if anyone follows the above steps thoroughly. After reading the article, if you are still struggling to move your website to the new host or if any of the steps are unclear to you; then you can let us know in the comment section.
When is the right time to migrate a website?
Changing the website host can be stressful. That’s why many website owners prefer not to move servers unless it’s urgent. You really don’t want to waste your time and energy on transferring your website to a new host, right?
So when is the proper time to start looking for a new host?
Perhaps, the following symptoms will tell you to look for a new host –
- Your website’s loading speed is too slow
- Your website is frequently going down
- You need more space for more resources
- The current customer support is horrible
- The current security is too poor, your website has been hacked many times.
- The current web host is charging too much
- You want to elevate your site to a greater service
Questions frequently asked by people regarding website migration
What does transferring a website to a new host mean?
Ans: Website migration can be defined into two scenarios –
- The process of moving your website from one server to another
- The process of moving your website from one domain (hosting platform, site location, design, etc) to another
We have taken the term lightly. So, this article refers to the first definition of website migration and describes the process accordingly.
How much does it cost to move a website to a new host?
Ans: The cost of transferring your website from one host to another starts from 0 to around $100. It depends on the complexity of the overall process. Some hosting providers offer free website migration services when you register for their service.
How long does it take to move a website to a new server?
Ans: The migration of your website will begin as soon as you register your domain name under the new host. All of your existing website data starts to migrate to the new server. The time to transfer the database and files to the new server usually takes around 30 minutes. But it may vary depending on the number of files and size of your database.
Can I host a website for free?
Ans: Yes, a website can be hosted without any cost. But there are lots of restrictions for free hosting. For example, there is no option to use your brand name on the domain and the resources are very limited. Your domain will be under a subdomain most likely. Talking about free website hosting, there are options for free domain registration.
Does changing web servers affect SEO?
Ans: Technically no. Switching your website from one server to another doesn’t have any effect on the SEO unless you change the structure, permalinks, or content. However, the quality of your hosting does have effects on SEO.


