Copyright © themeim All Rights Reserved.
La Evento - Event Management WordPress Theme
Created: 19 April 2022
Latest Update: 08 April 2022
La Evento Core Version: 1.0.0
La Evento Version: 1.0.0
By: ThemeIM
Thank you for purchasing our La Evento - Its unique features and functionalities
make it the ideal solution for websites dedicated to Event Management..
If you have any question, please feel free to contact us.
Install WordPress
To get this theme you must have WordPress already installed. If you need help installing WordPress, follow the instructions in WordPress Codex. Below are some useful links on WordPress information:
WordPress Codex – general information about WordPress and how to install it on your server.
First Steps With WordPress – general information included a wide variety of topics.
FAQ New To WordPress – most Frequently Asked Questions regarding WordPress..
If you are new in using WordPress here is video tutorial for you
Install Theme
when you purchase La Evento WordPress theme form Themeforest, you will be able to download La Evento Files form your download options. Unzip your downloaded file inside this zip your will find main-file and in main-file you will see 3 Folder and 2 zip Files. like below screenshort.

Install Theme Via WordPress
Step 01:
Login to your WordPress dashboard – then got to Appearance > Themes > Add New > Upload Theme and Click Choose FIle Button
Step 02:
Select La Evento.zip you downloaded form themeforest and click Install Now Button
Step 03:
Wait the theme being uploaded and installed. It may take some time.

Step 04:
Wait the theme being uploaded and installed.

Step 05:
To activate the theme click Activate. like above
Install Theme Via FTP
Follow the steps below to install theme via FTP.
Step 01:
Log into your hosting space via an FTP software
Step 02:
Unzip the La Evento.zip file and ONLY use the extracted La Evento theme folder
Step 03:
Upload the extracted La Evento theme folder into wp-content > themes folder
Step 04:
To activate the theme: Go to Appearance > Themes hover over the theme and and click Activate.
Common Install Error: Are You Sure You Want To Do This?
The “Are You Sure You Want To Do This” message may occur, means that you are limited in upload file size. Consider install the theme via FTP if this happens, or contact your hosting provider and ask them to increase the limited size.
Recommend Hosting
We recommend you to use ArnHost hosting to host your sites based on our themes.
ArnHost WordPress hosting is one of the most popular WordPress hosting trusted by millions of customers all over the world. Founded in 1996, it is reputable and serving for more than 850,000 WordPress websites. Besides, there are many blogs and websites recommend BlueHost WordPress hosting. However, is it really trusted? The answer is definitely YES.
Our company used ArnHost for building sites for our clients for years, this is why we can recommend this beautiful hosting for everyone. ArnHost provide excellent customer support, live chat, and reliability, that every serious product needs. This is “All in one” Unlimited CPanel hosting for very cheap price.
Install Required Plugins
Once you activated La Evento theme than You will get a notice for installing required plugins.
Step 01:
Click on Begin installing plugins to install required plugins.

Step 02:
Select all required plugin, From the top dropdown menu select Install and click Apply.
Step 03:
After Install all plugins sucessfully click Return to Required Plugins Installer.
Step 04:
Select all required plugin, From the top dropdown menu select Activete and click Apply.
Import Demo Data
To Import Demo Data – Now users can quickly and easily import our demo content with only one click to the button. This is the preferred method because it's the fastest and easiest way to get our demo content. It will import all our pages, posts, sliders etc.. If you wish to use our One Click Demo Content Importer, please see the guide below.
Please change Your Elementor Container Layout For Proper View Container Size "1200px" For Change Layout "Site Settings->Layout->Container Width"
Demo data is only for theme testing purpose. Do not install demo data on a production website.
Step 01:
Go to menu La Evento >Theme Options Rest All Options.
Step 02 :
To import demo data go on Appearance > Import Demo Data.


Step 03 :
Click on import demo data and please wait for import all data. It may take 3 to 5 minute depends on your sarver speed. Please be patient don't click import demo data button twice.
You can deactive one click demo import plugin after import demo data.
Step 04 :
Allow svg before starting the demo import.
SVG icons are disabled by default from WordPress. To allow SVG before import, you need to enable this at the server level. The easy way – add this plugin https://wordpress.org/plugins/svg-support/ and then make this check so just admin can add svg

Customizer Options
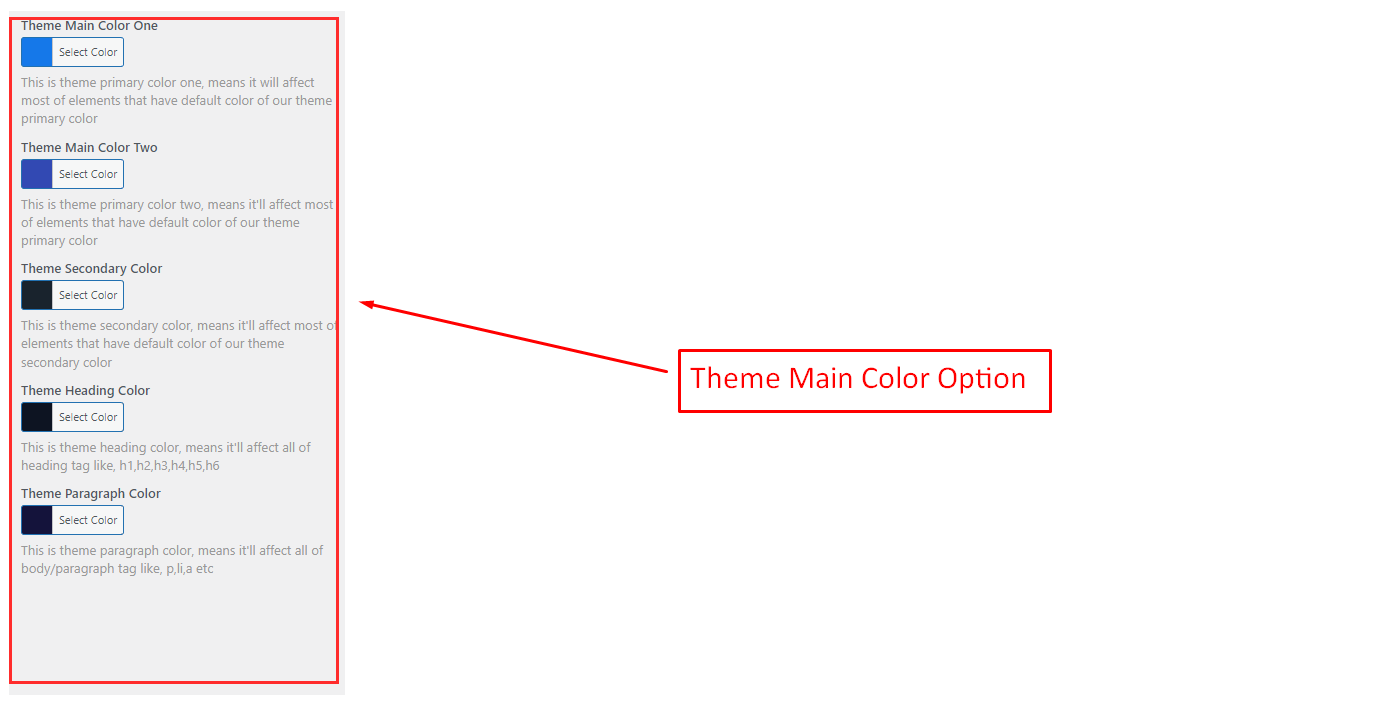
Using customizer options, you can control every most of the colors settings of the theme. Let’s start learning customizer options. Go to Appearance > customize > La Evento Options
Main Color
Theme Options
General Options

Set Global Header & Footer Style

Header Options

Breadcrumb

Footer One

Blog Page Post Options
01. Posted By
you can set Yes / No to show / hide posted by.
02. Posted On
you can set Yes / No to show / hide posted on.
03. Posted Category
you can set Yes / No to show / hide posted category.
04. Comment Number
you can set Yes / No to show / hide comment number.
05. Read More Button
you can set Yes / No to show / hide read more button.
06. Read More Text
you can set read more button text to button text.
08. Excerpt Button
you can set Yes / No to show / hide except button.
09. Excerpt More
you can set read more button text to button text.
10. Excerpt Length
you can set excerpt length for post.
Blog Single Post Options
01. Posted By
you can set Yes / No to show / hide posted by.
02. Posted On
you can set Yes / No to show / hide posted on.
03. Posted Category
you can set Yes / No to show / hide posted category.
04. Comment Number
you can set Yes / No to show / hide comment number.
05. Post Navigation
you can set Yes / No to show / hide post navigation.
06. Posted Tags
you can set Yes / No to show / hide post tags.
07. Post Share
you can set Yes / No to show / hide post share.
404 Page Options
01. Page Background Color
you can set background color.
02.Title
you can set title
03. Sub Title
you can set subtitle
04. Paragraph
you can set paragraph
05. Button Text
you can set button text
06. Page Spacing Top
you can set padding top
07. Page Spacing Bottom
you can set padding bottom
Blog Single Page Options
01. Select Page Layout
you can set page layout.
02. Page Background Color
you can set page background color
03. Page Spacing Top
you can set padding top
04. Page Spacing Bottom
you can set padding bottom
Archive Page Options
01. Select Page Layout
you can set page layout.
02. Page Background Color
you can set page background color
03. Page Spacing Top
you can set padding top
04. Page Spacing Bottom
you can set padding bottom
Search Page Options
01. Select Page Layout
you can set page layout.
02. Page Background Color
you can set page background color
03. Page Spacing Top
you can set padding top
04. Page Spacing Bottom
you can set padding bottom
Typography Options
Body Font
01. Typography
you can set font-family, font-style, font-size, line-height for body font except(h1,h2,h3,h4,h5,h6) those if you do not use another font for heading
02. Load Font Variant
you can select which font variant to load
Heading Font
01. Typography
you can set font-family, font-style, font-size, line-height for heading font for heading (h1,h2,h3,h4,h5,h6) tags
02. Load Font Variant
you can select which font variant to load
Page Settings
Layout & Colors Options
01. Page Layout :
Your can set page layout
02. Page Content Background Color:
you can set page content background color here
03. Page Background Color:
you can set page background color here
Page Header & Breadcrumb Options
01. Navbar Type:
you can set navbar type.
02. Page Title:
you can set Yes / No to show/hide page title.
03. Page Breadcrumb:
you can set Yes / No to show/hide page breadcrumb.
Page Width & Padding Options
01. Page Full Width:
you can set Yes / No to set page container full width..
02. Page Spacing Top:
you can set Padding Top for page container.
03. Page Spacing Bottom:
you can set Padding Bottom for page container..
04. Page Content Spacing :
you can set Yes / No to set page content spacing..
Custom Widgets
About Us
01. Logo:
you can upload logo for about us widget.
02. Descriptoin:
you can enter description for aobut us widget.
03. Phone Info:
Leave it blank if you don't want to show this info
04. Email Info:
Leave it blank if you don't want to show this info.
Recent Post With Thumbnail
01. Title:
you can set title.
02. No Of Posts:
you can no of posts.
03. Order:
you can set order.
04. Order By:
you can set orderby.
Contact Us
01. Title:
you can set title.
02. Location Info:
Leave it blank if you don't want to show this info.
03. Phone Info:
Leave it blank if you don't want to show this info
04. Email Info:
Leave it blank if you don't want to show this info.
How to use Elementor
Eelementor Page Builde Video Tutorial
if you are new in using elementor page builder here is video tutorial for you
How to use Contact Form 7
Getting Started with Contact Form 7
This guide is an introduction to the Contact Form 7 plugin for WordPress. Basic knowledge of WordPress administration is required. With various examples, this tutorial explains how to display a form on your page, and how to customize your forms and mail.
See easy step by step documentationIf you do not import our demo data then use this code for contact form
Booking Form
                    <div class="book-form">
                        <div class="row justify-content-center mb-20-none">
                            <div class="col-xl-3 col-lg-3 col-md-6 col-sm-6 form-group">
                                <label>From</label>
                                <div class="book-form-icon">
                                    <i class="icomoon-from-airplane"></i>
                                </div>
                                [select* menu-99 id:menu-01 class:form--control "Bangladesh" "Nepal" "Sir Lanka" "India" "Chaina" "USA"]
                            </div>
                            <div class="col-xl-3 col-lg-3 col-md-6 col-sm-6 form-group">
                                <label>To</label>
                                <div class="book-form-icon">
                                    <i class="icomoon-to-airplane"></i>
                                </div>
                                [select* menu-99 id:menu class:form--control "Bangladesh" "Nepal" "Sir Lanka" "India" "Chaina" "USA"]
                            </div>
                            <div class="col-xl-3 col-lg-3 col-md-6 col-sm-6 form-group">
                                <label>Date</label>
                                <div class="book-form-icon">
                                    <i class="icomoon-schedule-icon"></i>
                                </div>
                                [date* date-771 id:date class:form--control]
                            </div>
                            <div class="col-xl-3 col-lg-3 col-md-6 col-sm-6 form-group">
                                <label>Passenger</label>
                                <div class="book-quantity">
                                    <div class="book-plus-minus">
                                        <div class="dec qtybutton">-</div>
                                    [number* number-20 min:1 max:20 id:number class:book-plus-minus-box qty "2"]
                                        <div class="inc qtybutton">+</div>
                                    </div>
                                </div>
                            </div>
                            <div class="col-xl-12 text-center form-group">
                                <button type="submit" class="wpcf7-submit boxed-btn"><i class="icomoon-btn-icon"></i>Book Now</button>
                            </div>
                        </div>
                    </div>
Book This Tour
                    <div class="package-book-form mb-20-none">
                        <div class="form-group">
                            <label class="icon"><i class="icomoon-name_icone"></i></label>
                            [text* text-685 class:form--control placeholder "Name*"]
                        </div>
                        <div class="form-group">
                            <label class="icon"><i class="far fa-envelope-open"></i></label>
                            [email* email-413 class:form--control placeholder "Email"]
                        </div>
                        <div class="form-group">
                            <label class="icon"><i class="icomoon-call_icone"></i></label>
                              [tel* tel-214 class:form--control placeholder "Phone*"]
                        </div>
                        <div class="form-group text-center">
                            <button type="submit" class="wpcf7-submit btn--base"><i class="icomoon-btn-icon-v2"></i>Book Now</button>
                        </div>
                    </div>
FAQ Form
                        <div class="contact-form-area">
                            <div class="row justify-content-center mb-20-none">
                                <div class="col-xl-6 col-lg-6 form-group">
                                    <label class="icon"><i class="icomoon-name_icone"></i></label>
                                    [text* text-685 class:form--control placeholder "Name*"]
                                </div>
                                <div class="col-xl-6 col-lg-6 form-group">
                                    <label class="icon"><i class="far fa-envelope-open"></i></label>
                                    [email* email-413 class:form--control placeholder "Email"]
                                </div>
                                <div class="col-xl-6 col-lg-6 form-group">
                                    <label class="icon"><i class="icomoon-call_icone"></i></label>
                                    [tel* tel-214 class:form--control placeholder "Phone*"]
                                </div>
                                <div class="col-xl-6 col-lg-6 form-group">
                                    [select* menu-892 class:form--control "Subject One" "Subject Two " "Subject Three"]
                                </div>
                                <div class="col-lg-12 form-group">
                                    <label class="icon"><i class="icomoon-massage"></i></label>
                                [textarea* textarea-959 class:form--control placeholder "Message*"]
                                </div>
                                <div class="col-lg-12 form-group">
                                <button type="submit" class="wpcf7-submit btn--base">Send Message<i class="icomoon-Group-2361 ml-2"></i></button>
                                </div>
                            </div>
                        </div>
Subscribe Form
                <div class="subscribe-form">
                    [email* email-413 class:form--control placeholder "Email"]
                    <button type="submit" class="wpcf7-submit btn--base">Subscribe Now <i class="icon-btn-icon"></i></button>
                [checkbox checkbox-692 class:form-box-check use_label_element "I've read and accept the Privacy Policy."]
                </div>
How to use MailChimp With WordPress
How To Integrate MailChimp With WordPress in Minutes
if you are new in using MailChimp With WordPress here is video tutorial for you
Supports
Thank you for reading the documentaion. If you still have any question or any problem, please contact with us. We will give you best support. Thanks.
themeim